Gravity Flow Racks Guide For Maximum Warehouse Efficiency
Learn how gravity flow racks improve warehouse efficiency by boosting throughput, cutting labor costs, and maximizing storage space with...
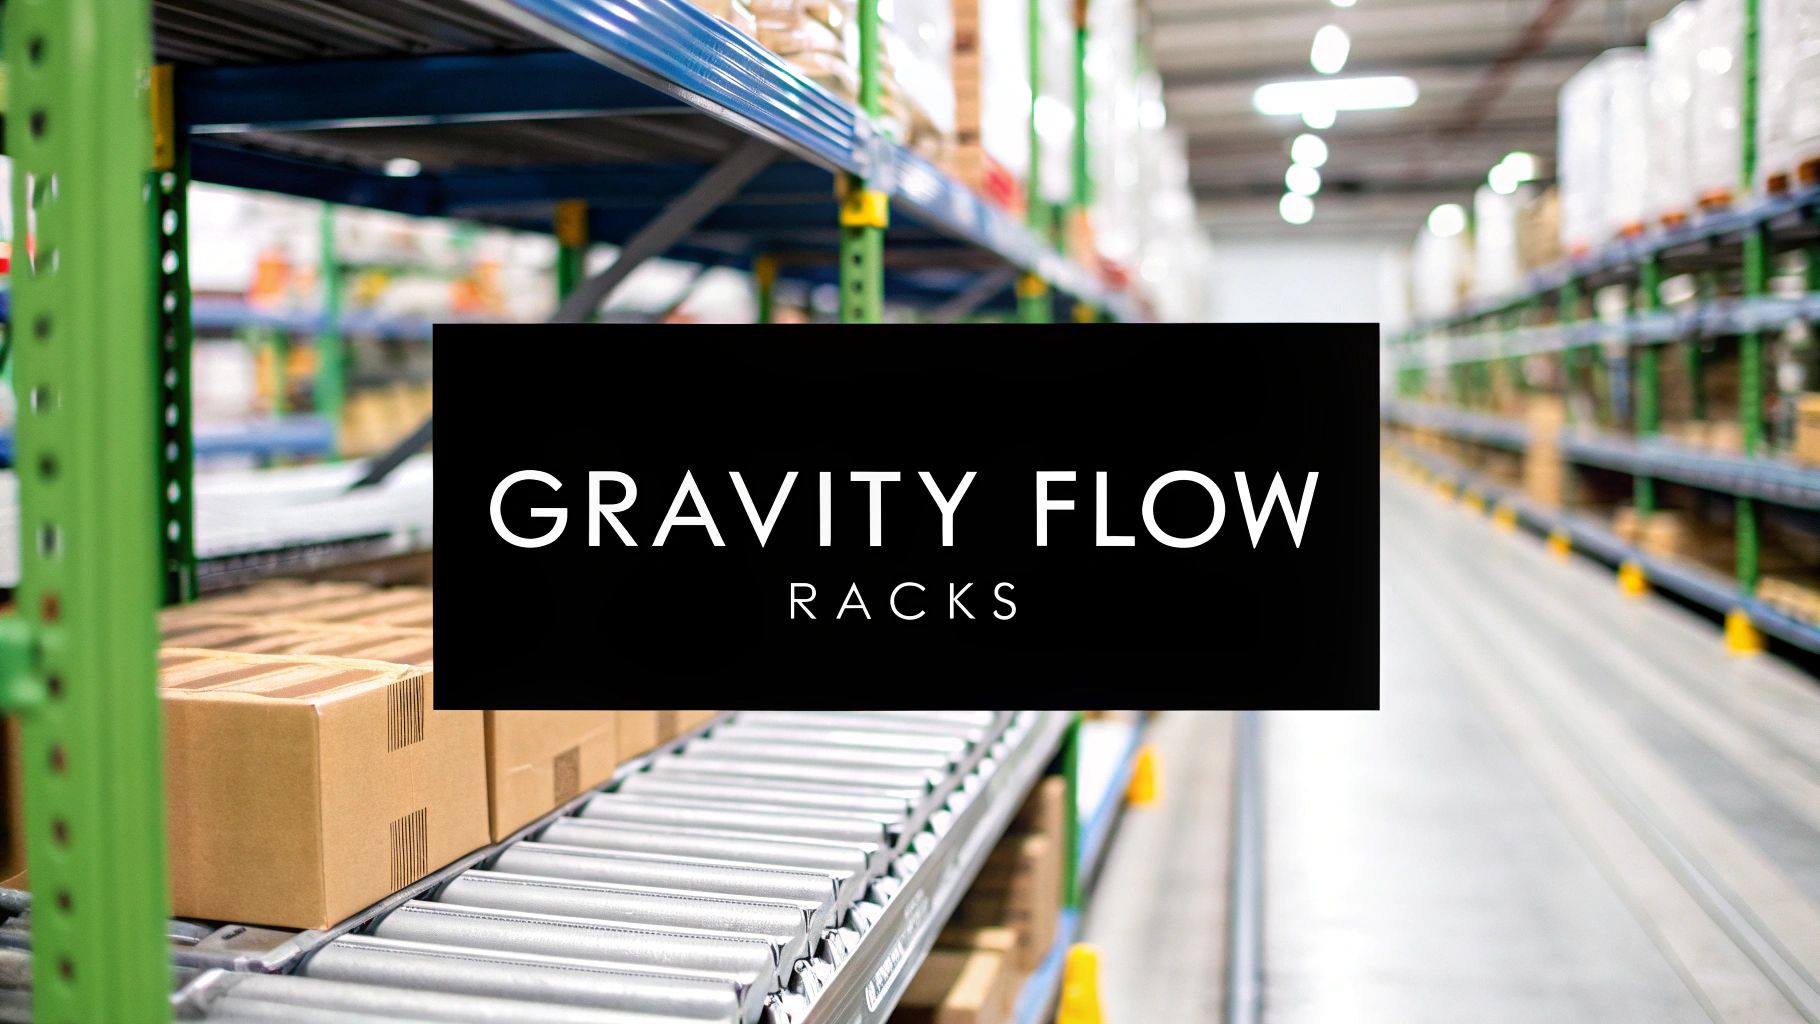

How Gravity Flow Racks Transform Warehouses
Gravity flow racks tap into the simplest force around—gravity—to move products along slightly sloped shelves. That gentle nudge speeds up picks, cuts down on manual handling and keeps items moving without extra effort. These lanes operate on FIFO principles, so the oldest stock always leads the way.
Imagine a supermarket checkout belt tilted just enough for your basket to glide forward—that’s exactly how gravity flow racks work. Small rollers or wheels on an incline let cartons roll from the loading point to the pick face, eliminating constant forklift travel and reach-in picks.
- Cuts down on forklift traffic and manual lifting
- Keeps stock flowing for faster order fulfillment
- Ensures perishable items rotate naturally via FIFO
Relatable Conveyor Analogy
To put it another way, think of your local grocery’s checkout belt. As soon as the cashier waves your groceries forward, each item rolls on its own. Gravity flow racks borrow that same logic on shelving units, making sure the next carton is always waiting at the front.
By reducing unnecessary handling, teams can focus on quality checks and higher-value tasks instead of repetitive shuttling.
Global Market Overview For Gravity Flow Racks
Here’s a quick look at how gravity flow racks are performing around the world:
Overall, the global market for gravity flow racks reached roughly $2.5 billion in 2024, with an expected CAGR of 6% over the next several years. For a deeper dive, see the full research on MarketReportAnalytics.
Real World Examples
In practice, gravity flow racks shine in diverse settings:
- Food & Beverage Distribution: Cold storage facilities use these lanes to handle perishables, slashing spoilage by 20% thanks to built-in FIFO rotation.
- Automotive Kitting: Midwestern warehouses managing dozens of SKUs per kit report a 30% drop in pick errors.
- E-Commerce Fulfillment: High-volume operations see pick throughput climb over 75% when they install gravity-fed lanes.
Guide Preview
In the sections ahead, we’ll walk through:
- Design Decisions: From roller pitch and lane angle to material choices
- Operational Benefits: How you save labor hours and reclaim floor space
- Safety & Maintenance: Best practices for reliable performance
- Cost & ROI Analysis: Calculating payback periods and justifying investment
- Implementation Tips: Steps for OEM and Tier 1 supply chains
Before you dive in, check out our detailed layout guide on building a warehouse. This introduction sets the stage—next up, we’ll explore core concepts and advanced strategies to get the most from gravity flow systems.
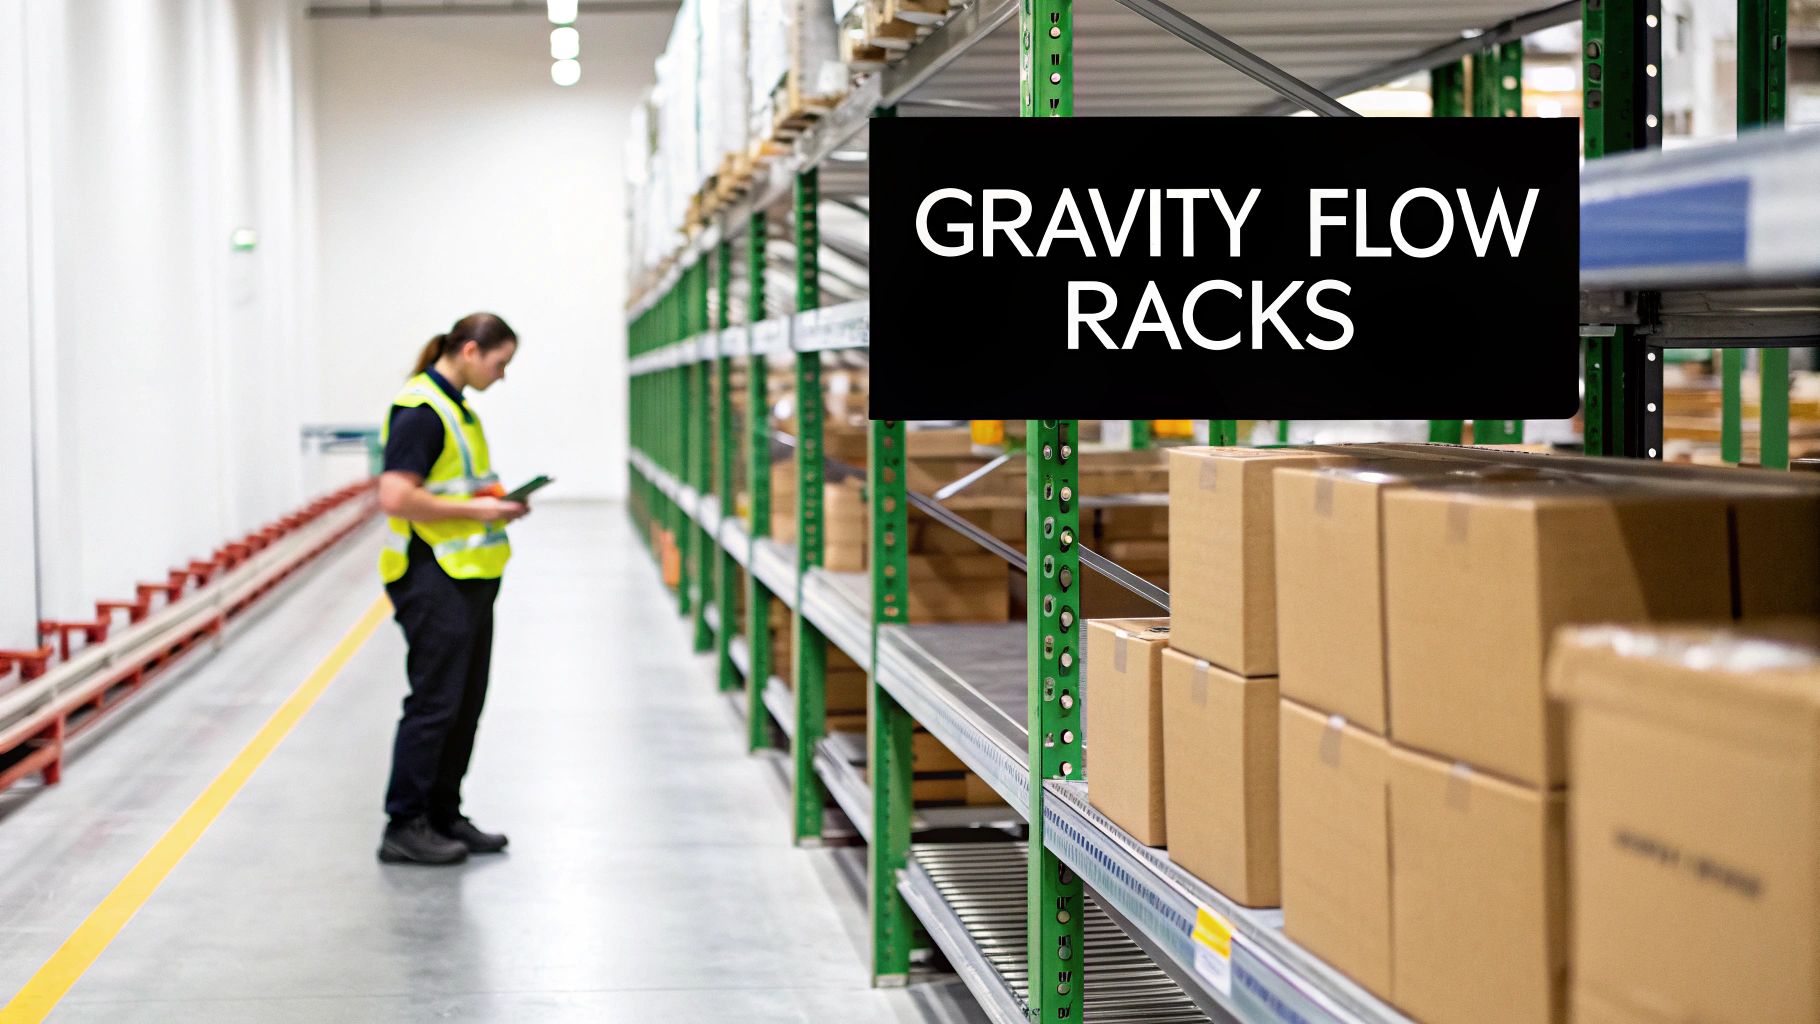
Understanding Gravity Flow Rack Mechanics
Gravity flow racks use gravity and a gentle incline to keep cartons moving—no motors required. Picture a supermarket checkout belt tilted just enough so your basket glides smoothly toward the cashier.
Inside, you’ll find roller lanes, wheel beds, end stops, dividers and a way to tweak the slope. Rollers are spaced to cradle every box evenly, while wheel beds spin freely under odd-shaped or lightweight packages.
End stops at the front edge act like bumpers, keeping cartons from tumbling off. And with angle settings from 1.5° to 3°, you get just the right balance of speed and control.
Core Components
- Roller Lanes: Handle heavier loads with cylinders that offer a smooth, predictable glide.
- Wheel Beds: Use clusters of small wheels to adapt to irregular shapes without jamming.
- End Stops & Dividers: Keep items neatly aligned and protect against overflows.
- Slope Adjustments: Let you dial flow rate up or down based on carton weight.
These parts combine into a self-feeding lane that cuts out extra handling steps and keeps inventory moving.
Flow Sequence
A simple three-step flow keeps things logical:
- Load cartons at the back of each lane.
- Gravity pulls items gently toward the pick face.
- Picker grabs the front carton and the next slides into place.
By eliminating back-and-forth trips, this sequence accelerates order cycles and reduces fatigue.
Industry Evolution
Gravity flow racks date back to the automation surge of the 1980s. They stayed niche until e-commerce demand surged after 2010, and now they’re everywhere.
The global warehouse racking market is forecast to grow by USD 2.3 billion from 2025 to 2029. See the full projection on PR Newswire.
This steady climb shows how gravity flow racks have matured alongside online retail booms.
Integration With Pick Modules
Gravity flow lanes slip right into pick-module designs, feeding stations without pauses. You can sequence SKUs by grouping lanes with matching pitches and dividers.
Key Insight Selecting the correct lane pitch based on carton length prevents jams and keeps throughput steady.
Adjustable end stops act like speed bumps when lanes empty too fast. Pair them with sensors or pick-to-light displays to monitor flow and flag low volumes instantly.
Design Considerations
Every detail affects performance. Slope, roller spacing, load capacity and even surface finish play a role.
- Slope Degree: Anything steeper than 3° often needs speed dampers.
- Roller Pitch: Tighter spacing supports smaller cartons—at a higher cost.
- Material Type: Steel rollers for bulkier loads; plastic wheels to cut noise.
- Adjustability: Modular lanes let you reconfigure as SKUs change.
A small pilot run or simulation can uncover flow hiccups before you commit to a full rollout.
Quick Tips
- Test your chosen slope with cartons of varying weights.
- Inspect rollers every month and clear debris weekly.
- Tweak the angle if boxes stall at the top or zoom through too fast.
Even minor adjustments can unlock major efficiency gains.
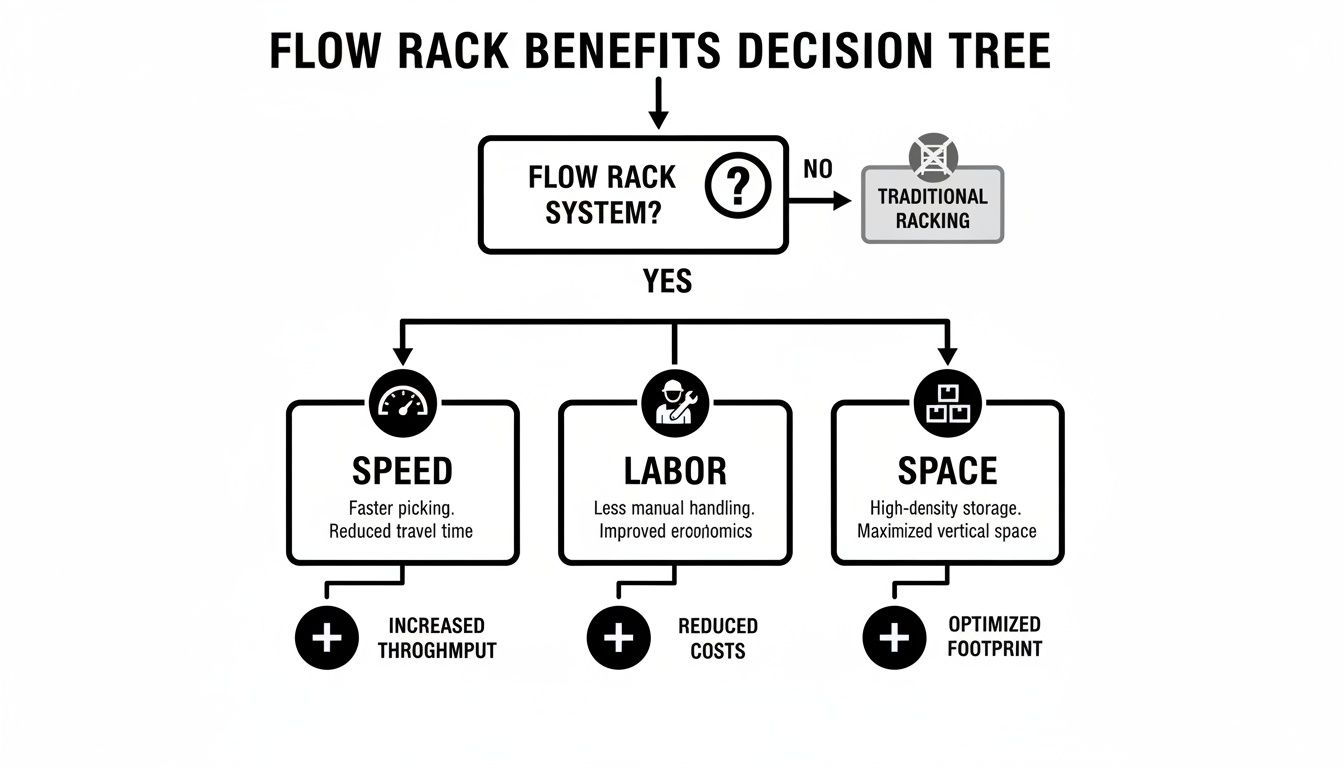
Benefits Of Using Gravity Flow Racks
If you’ve spent time in a busy warehouse, you know that every second counts. Gravity flow racks bring measurable results by keeping cartons moving smoothly from one pick point to the next. In this section, we’ll unpack how they drive gains in throughput, labor savings, space utilization, and product freshness.
Boost Picking Throughput
Picture a gentle slope of rollers nudging each box forward. In real terms, that setup can lift your picking throughput by up to 75%.
On a typical day, an operation moving 500 picks per hour can climb to 800 picks once the rack is in place.
“Gravity-fed lanes helped our fulfillment center slash pick times by 50%,” says a logistics manager.
Save Labor And Space
Gravity flow racks don’t just speed up picking—they also ease the load on your team. Many facilities see 30–40% lower labor costs thanks to fewer extra steps and less manual handling.
At the same time, you can slot 60–75% more product into the same square footage compared to static shelving. Key benefits include:
- Fewer walking miles per picker, cutting fatigue
- Denser layouts with minimal new aisles
- Less forklift congestion in busy pick zones
Operational Benefits Comparison
The table below puts gravity flow racks head-to-head with traditional static shelving.
These numbers illustrate how a switch to gravity-fed lanes transforms daily operations.
Real World Examples
Take a cold-storage facility battling subzero temps and slippery aisles. Once gravity flow racks went in, retrieval times dropped from several minutes to just seconds.
Key takeaways from food distributors:
- Spoilage dropped by 20% through strict FIFO rotation
- Pick errors plunged 25% with clearly defined lanes
- Shrinkage slid under 1% even on high-turnover SKUs
Global data shows the carton-flow market hit USD 2.5 billion between 2023 and 2025 and is growing at 6–7% CAGR. Roughly 40% of these systems live in distribution centers, where they routinely boost efficiency by 75%. For more, see the report from MarketGrowthReports.
Building A Strong ROI Case
Numbers become compelling when they translate into dollars and cents. Stack your throughput gains, labor savings, and reclaimed floor space to forecast an 18–24 month payback.
For extra insight on optimizing stock movement, check out our article on stock and replenishment.
Investing in gravity flow racks often pays for itself within 18–24 months based on lower operating costs and higher throughput.
Crafting A Stakeholder Pitch
When you present to finance or the plant manager, tie each metric to real-world savings:
- Current picks per hour and labor cost per hour
- Expected pick increase and headcount reduction
- Floor space reclaimed and its redeployment value
- Projected payback period and overall ROI
For example, a Tier 1 automotive line saw $150,000 in annual labor savings and a 24-month payback.
Stakeholders responded to clear numbers and a 24-month payback forecast.
By framing the story this way, operations leaders, finance teams, and plant managers rally around a shared efficiency goal.
Taken together, gravity flow racks deliver a triple win: faster throughput, lower costs, and more usable space. Next up, we’ll explore how to select the right rack configuration for your SKU mix and facility layout.
Wolverine Assemblies, LLC has implemented gravity flow rack systems for OEM automotive lines in our 200,000+ square-foot facility—proving these benefits in action. Ready to see the same results? Partner now for results.
Choosing The Right Gravity Flow Racks
Matching a gravity flow rack to your warehouse starts with understanding your product mix. Think of it like finding the right shoe size—too loose, and cartons fumble; too tight, and they get stuck. From there, your facility’s footprint and throughput targets guide choices around lane configuration and materials.
A solid grasp of lane slope, roller pitch, and load capacity keeps operations humming. In practice, that means measuring your SKUs and confirming material compatibility before issuing an RFP.
Key Selection Criteria
First, lane slope typically falls between 1.5° and 3°. A shallower angle offers gentle, controlled movement. Steeper slopes accelerate flow but usually need speed dampers.
Next up is roller pitch. Narrow spacing handles small cartons; wider gaps suit bulkier items. Don’t forget how roller material impacts friction—and noise—on the warehouse floor.
Finally, size each lane by weight. Base your calculations on the heaviest SKU, then build in a 20% safety margin to absorb occasional surges. Verify lane depth against the longest carton to prevent jams.
- Test Various Slopes With Sample Loads
- Optimize Roller Spacing For Your Carton Sizes
- Choose Steel Rollers Or Plastic Wheels For Compatibility
- Plan Capacity With A 20% Buffer Above Peak Weight
Comparing Rack Types
Choosing between roller bed, wheel bed, and carton flow is all about SKU shape and weight. Roller beds excel with uniform cartons. Wheel beds adapt to irregular or soft-bottom items. Carton flow lanes, meanwhile, provide a budget-friendly answer for lightweight boxes.
“When we matched rack styles to our product profiles, we saw a 30% drop in pick errors on our pilot line.”
Integration With Conveyors And Sorters
Gravity flow racks shine when they link seamlessly to conveyors or sorters. Modular interface rails or adjustable stands bridge the gap, cutting down on manual transfers and speeding up order fulfillment.
Automated sorters can route cartons by sequence, while sensors or pick-to-light systems flag low-stock lanes and trigger replenishment—so your team always knows where to go next.
- Map the path from racks to sort stations
- Align interface decks with conveyor heights
- Tie into your WMS for live flow monitoring
Drafting Precise Specifications
Be crystal clear in your RFP. Call out exact slopes, roller spacing, and load tests. Specify SKU testing at 120% of maximum weight to ensure vendor proposals meet real-world demands.
Require suppliers to detail adjustment ranges, optional dampers, and installation support. Don’t skip maintenance training—empowered teams smooth out commissioning bumps.
- Define Slope And Pitch Targets By SKU Category
- Require Load Testing At 120% Of Expected Maximum
- Document Material Finishes And Wear Ratings
Next Steps For Implementation
Before a full rollout, set up a pilot lane. Track cycle times, note any jams, and gather operator feedback on flow and handling—this data sharpens your specs.
Use a vendor scorecard to compare lead times, costs, and service terms. Focus on delivery windows and warranty coverage to pinpoint your strongest partner.
- Pilot Testing: Track Cycle Time And Jam Frequency
- Vendor Scorecard: Evaluate Cost, Quality, And Support
- Training Plan: Schedule Operator And Maintenance Workshops
With specs locked, issue your RFP and review bids alongside engineering and procurement. Finally, agree on kick-off dates to align every team—and pave the way for a smooth project launch.
Optimizing Warehouse Layout With Gravity Flow Racks
When you weave gravity flow racks into your warehouse layout, picking flows more naturally and handling steps drop off. By situating pick modules just off the main aisles, you shave minutes—and fatigue—off every shift.
Finding the right balance between the number of flow lanes and your target pick velocity is like tuning a race car: too few lanes and you stall, too many and you waste precious real estate.
Key Layout Factors Include:
- Ergonomic Pick-Module Placement: Position modules close to rollers for faster access
- Defined Buffer Zones: Absorb sudden spikes and protect adjacent work areas
- Dual-Deep Configurations: Maximize density by staging two cartons deep behind each pick face
- Sequenced Staging Lanes: Size lanes specifically for kitting or build sequencing
- Reverse Replenishment Paths: Feed stock against the pick flow to prevent interference
These considerations feed into a simple flowchart or sample layout model. By mapping cycle times against lane depth, you’ll spot pinch points long before construction begins. For instance, a 200-pick-per-hour goal often works best with 6 lanes handling 30 picks each before refill.
Planning Buffer Zones
Think of buffer zones as the shock absorbers in your warehouse suspension. They hold extra cartons when pick demand surges or replenishment falls behind. A buffer sized for a 15-minute spike keeps everything moving steadily.
Steps For Buffer Planning
- Calculate peak pick rate per hour and convert to items per minute
- Multiply items per minute by your buffer duration (in minutes)
- Check this buffer count against lane capacity—tweak lane slope if needed
Modeling Throughput And Lane Counts
Throughput modeling is like simulating a highway onramp: cars merge smoothly until volume overwhelms the entry point. Treat each flow lane as an onramp—too few lanes cause jams, too many waste space.
This comparison lets you spot flow drop-offs before lane refills. Position replenishment stations behind the racks so stock flows into lanes without crossing pick paths.
Replenishment Best Practices:
- Rotate stock using FIFO or FEFO to keep inventory fresh
- Trigger pull-based replenishment in your WMS when lane depth hits 25%
- Schedule replenishment during planned breaks to avoid busy pick windows
Designing Staging Areas
Staging areas are your warehouse’s pit stops—quick, precise, and essential. They hold sequence builds and kitting kits close at hand, reducing frantic last-minute searches.
Dual-deep lanes let you preload two cartons for continuous availability.
“Effective staging trims cycle time by 12% in automotive kitting lines”
Keep flow unhindered with clear floor markings and safety barriers. Good signage cuts errors and keeps pick lanes obstruction-free.
- Mark pick spots with aisle numbers and lane codes for instant recognition
- Install low-profile guard rails to shield lanes from forklift impacts
- Provide ergonomic access points at regular intervals for safe loading
Before you finalize the layout, walk the floor. Review actual traffic patterns and gather operator feedback.
Learn more about strategic warehouse layout planning in our guide on warehouse layout and design.
Finally, loop in engineering to catch any clearance issues around roller angles. Coordinate with maintenance teams to set up roller inspections and lubrication schedules.
This layered planning delivers a system that hums through 24-hour operations with minimal downtime. Pilot runs validate throughput assumptions and reveal hidden pinch points—then you tweak lane counts, slopes, and buffer sizes before full rollout.
Well-structured layouts transform gravity flow racks into high-speed supply chain arteries, cutting labor by 30% and boosting space utilization in a big way.
Gravity Flow Racks Implementation And Maintenance
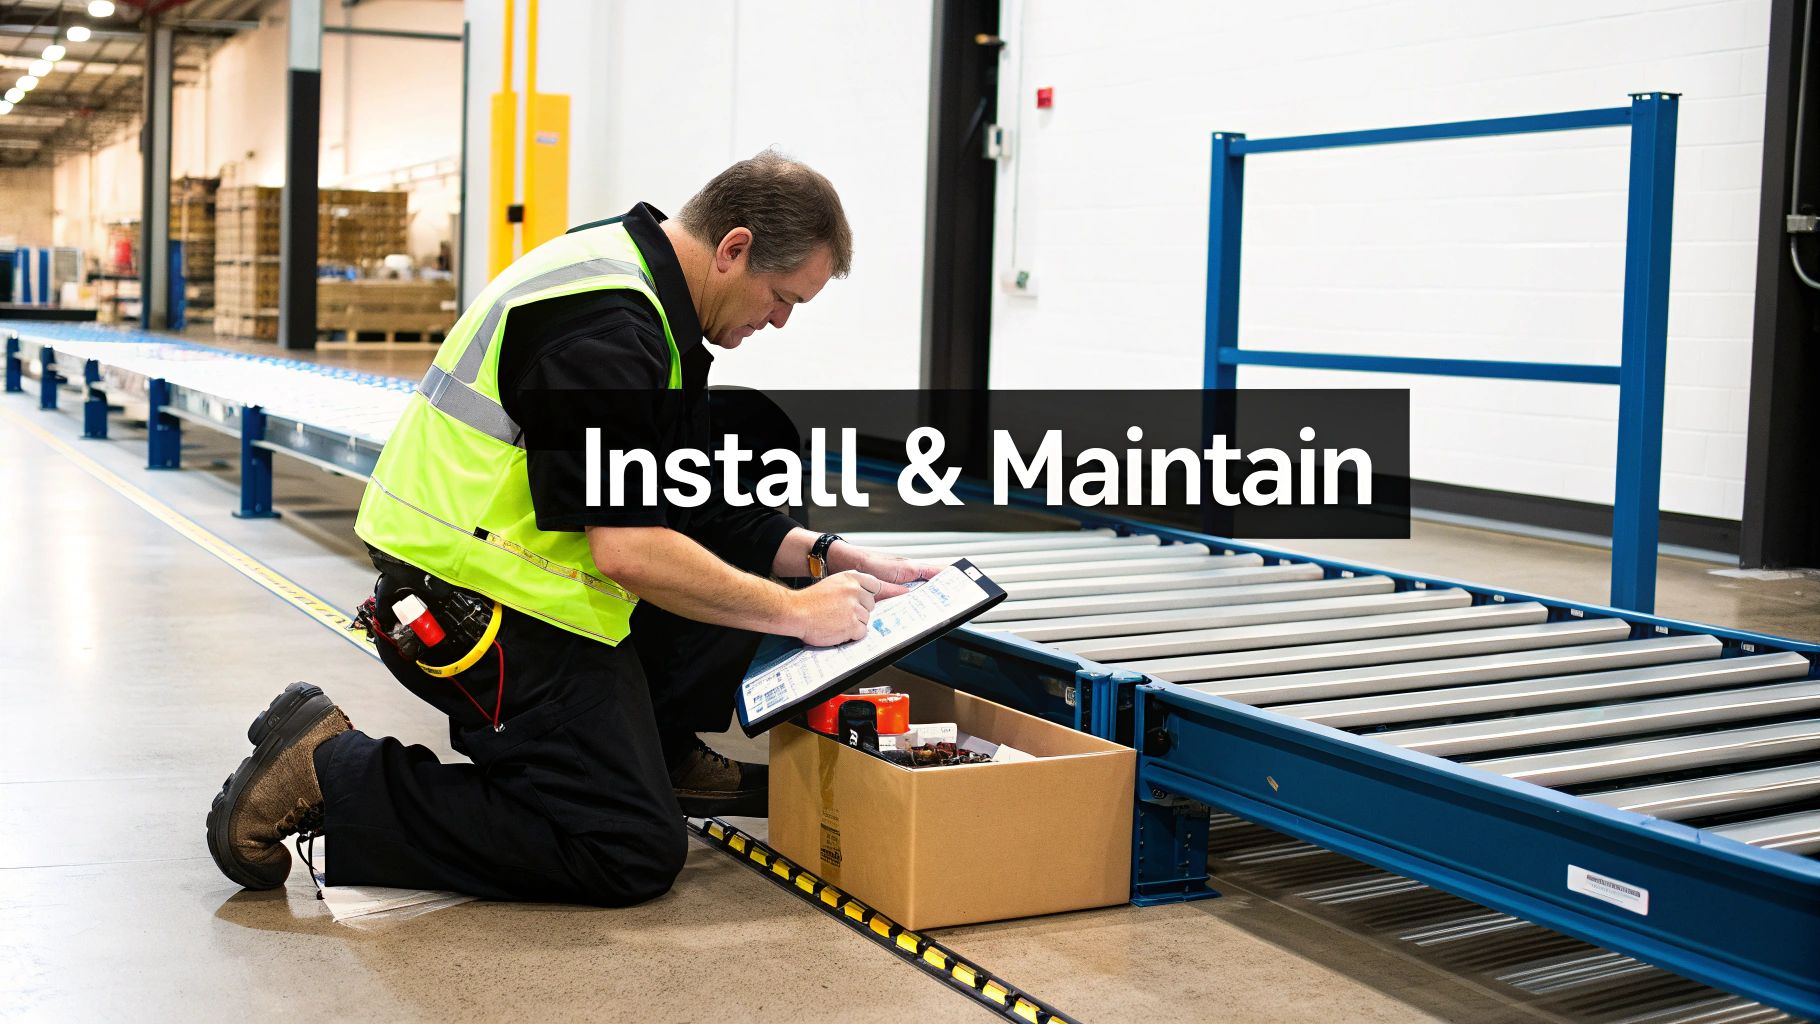
Bringing gravity flow racks online is more than just hardware—it’s about precise planning and well-defined team responsibilities. From day one, safety protocols and a solid maintenance roadmap should steer every step.
Start by mapping rack zones alongside power sources and workflow connections. This ensures each lane feeds seamlessly into conveyors and pick modules.
Safety Measures And Ergonomic Support
Small touches make a big difference. Installing end-stops at the front of lanes acts like a warehouse shock absorber, catching cartons before they sail into pick areas.
Safety barriers at critical intersections function like guard rails on a highway, channeling traffic and cutting collision risks.
- Install end-stops with adjustable dampers to manage carton speed.
- Position barriers at aisle entries to protect operators.
- Provide height-adjustable tables to keep work at waist level.
Ergonomic aids go hand in hand with safety. When loading tables adjust to waist height, operators avoid repeated bending, which reduces fatigue and keeps focus sharp through busy shifts.
Regular training ensures every team member masters proper loading and unloading techniques. Drills and clear signage reinforce safe handling and swift responses across the operation.
Maintenance Checklist
Consistent upkeep is the secret to reliable flow rack performance. A structured checklist helps you spot minor wear before it becomes major downtime.
- Inspect rollers monthly for wear or misalignment.
- Lubricate bearings quarterly to banish grinding and corrosion.
- Clear lane debris weekly to keep items flowing.
- Run load-limit tests semiannually to verify safety margins.
- Check end-stops for proper cushioning and tweak as needed.
- Calibrate dampers after any lane modification.
After each task, log your findings in a digital record with timestamps. This habit not only keeps teams accountable but also highlights recurring trouble spots over time.
“Routine checks can extend rack life by 50%, cutting replacement costs and downtime.” —Warehouse Engineer
Encourage operators to report odd noises, vibrations, or jams immediately. Catching issues early is your best defense against unexpected breakdowns.
Tracking Metrics And ROI
Turning maintenance into measurable insights is like racing with clear mile markers—you know exactly when to pick up the pace.
- Compare picks per hour before and after rack deployment to quantify labor gains.
- Monitor MTBF to fine-tune maintenance intervals for optimal uptime.
- Measure slot count per square foot to validate space utilization improvements.
In practice, many warehouses achieve a 2–3 year payback period through combined labor savings and efficiency gains.
Pilot Deployment And Supplier Collaboration
Think of a pilot as a dress rehearsal before opening night. Start with a single flow lane matched to your most common SKU. Gather operator insights and cycle-time data to spot any snags.
- Define pilot scope with clear throughput and safety goals.
- Collect detailed feedback on ergonomics and lane performance.
- Share scan logs and performance metrics with suppliers for rapid tweaks.
- Roll out successful pilots in controlled phases across remaining zones.
As you scale, partner closely with your supplier. Sync ERP or WMS triggers to automate replenishment when lanes run low.
For OEM and Tier-1 supply chains, require suppliers to meet just-in-time delivery benchmarks.
FAQ
Below, you’ll find clear, hands-on answers to the questions we hear most often about gravity flow racks. Use these insights to fine-tune your planning and keep operations humming.
These pointers cover bed styles, slope setup, upkeep routines, and smart integration—so you can make decisions with confidence.
Common Questions On Gravity Flow Racks
What’s the Difference Between Roller Bed and Wheel Bed Systems?
Roller beds feature evenly spaced cylindrical rollers, letting standard cartons glide smoothly—think of train cars on a track.
Wheel beds, by contrast, use clusters of small wheels (imagine a tiny roller rink) to cradle odd shapes or softer-bottom products, preventing jams and ensuring an even flow.
- Roller Beds: Ideal for uniform cartons and boxes; low maintenance.
- Wheel Beds: Perfect for irregular packages or delicate items; more forgiving under varied loads.
How Do You Calculate the Perfect Lane Slope?
Finding the right angle is like tuning a music box—too steep, and your load rushes ahead; too flat, and it stalls. Start by weighing your cartons and determining the friction coefficient, then target a slope between 1.5° and 3°.
- Run a few test loads before finalizing
- Make small angle adjustments, not big leaps
- Balance speed against product safety
Maintenance And Integration Tips
What Upkeep Keeps Gravity Flow Racks in Top Shape?
A simple schedule goes a long way:
- Weekly: Sweep away dust and debris
- Monthly: Inspect rollers for wear
- Quarterly: Lubricate bearings
- Every 6 Months: Perform load-capacity tests
Stick to this routine to avoid jams and maintain steady throughput.
How Do You Connect Gravity Flow Racks to Conveyor and WMS Systems?
Start with modular interface decks or adjustable stands to bridge your rack lanes to the main conveyor. Then, let your warehouse management system’s pick-path logic do the rest—triggering restocks and tracking rack velocity in real time.
Consistent upkeep and live monitoring can extend rack life by 50%, slashing unexpected downtime.
Ready to streamline your warehouse flow? Partner with Wolverine Assemblies, LLC for custom gravity flow rack solutions backed by industry expertise.
Subscribe to our weekly newsletter