Warehouse Layout and Design: Optimize Space, Workflow, and Efficiency
Discover how warehouse layout and design optimize space, flow, and efficiency with actionable tips, layouts, and technology integration.

Your warehouse layout isn't just about where you put the shelves. It’s the engine that drives your entire operation. A smart design turns a simple storage space into a high-performance hub, directly impacting labor efficiency, order fulfillment speed, and your bottom line.
Get it wrong, and you're stuck with costly bottlenecks and dangerous working conditions.
Your Layout Is Your Biggest Competitive Edge
Let's stop thinking of a warehouse as just a box to hold inventory. In today’s high-stakes supply chain, the physical flow of your goods is what determines whether you can compete. A well-planned facility—for a 3PL or a light-assembly operation—is a powerful asset that shows up in your profit margins.
A poor layout isn't a minor inconvenience. It’s a domino effect of real-world problems that bleed cash and frustrate your team.
- Shipping Bottlenecks: When receiving, putaway, and shipping zones are mashed together without a clear flow, you get traffic jams. Trucks wait longer, and customer orders get delayed.
- Wasted Labor Hours: If your team has to walk halfway across the building for a single pick, you’re paying them to travel, not to be productive. Every extra step is a direct hit to your labor costs.
- Increased Safety Hazards: Crowded aisles, chaotic staging areas, and poor traffic flow are recipes for accidents. This puts your people at risk and threatens your operational uptime.
One flaw can set off a chain reaction, leading to total operational failure.
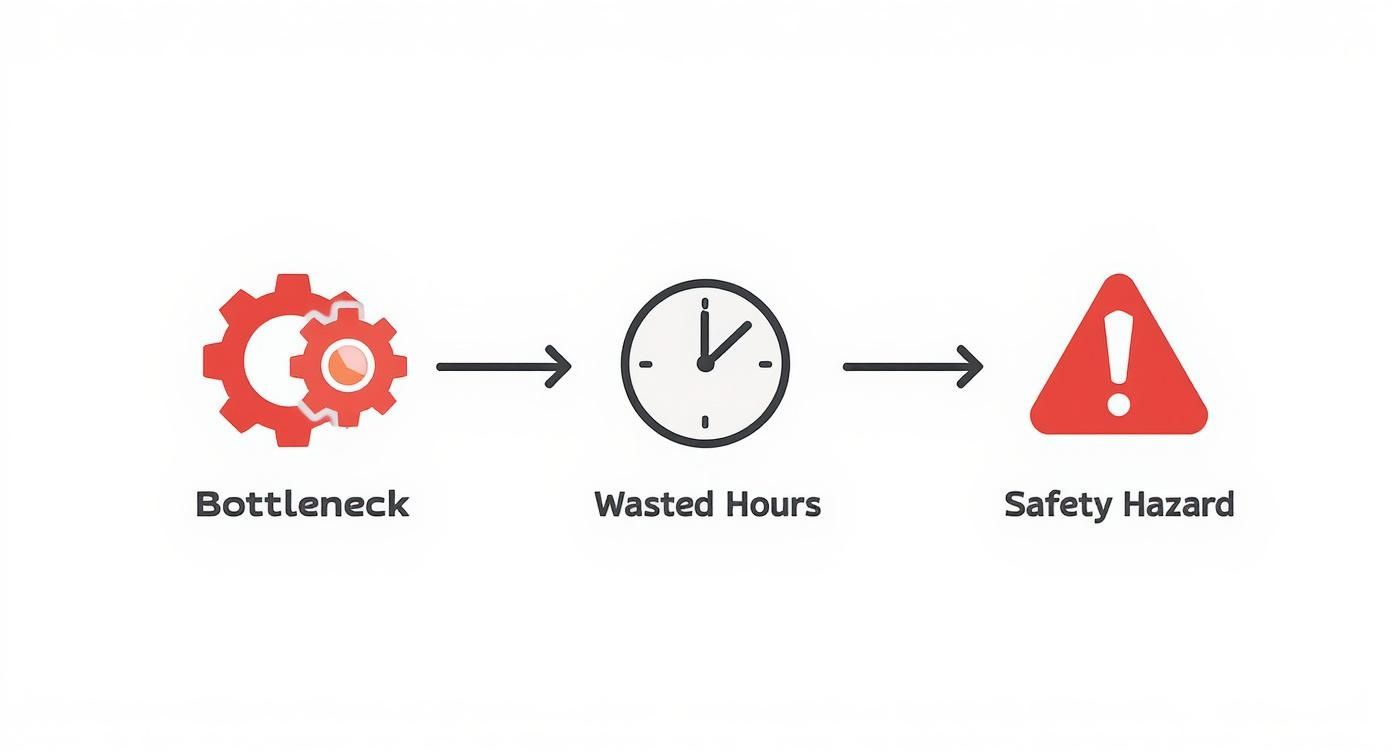
As the visual shows, unresolved bottlenecks are the root cause of wasted time, which almost always elevates the risk of something going wrong.
The Growing Importance of Smart Design
The push for strategic warehouse layout isn't just anecdotal—it’s a massive market focus. The industry was valued at USD 5.6 billion in 2025 and is projected to hit USD 10.4 billion by 2035, growing at a compound rate of about 6.4%.
Right now, high-rise warehousing makes up 46.0% of that market, driven by the need to cram more storage into smaller urban footprints. You can dig into more of this data by exploring the latest warehouse design and layout market research.
A great layout doesn't just store products efficiently—it anticipates movement. It’s about creating a system where people, equipment, and inventory flow in a coordinated, predictable, and productive manner.
This guide is all about practical, actionable steps to get your space there. We're focused on building a layout that not only works for you today but is also flexible enough to handle the technology and challenges of tomorrow.
Mapping Your Operational Blueprint Before Laying Out a Single Rack
Before you even think about sketching an aisle or pricing out pallet racking, the real work begins. The most successful warehouse layouts are a direct reflection of your operational reality. You have to get a deep understanding of the heartbeat of your facility—how products, people, and equipment actually move from point A to point B.
Jumping straight to the physical layout without this groundwork is like building a house without a blueprint. Sure, it might stand for a bit, but it’ll be inefficient, frustrating for your team, and incredibly expensive to fix down the road.
Let Your Inventory Tell the Story
First things first: you have to let your data do the talking. Not every SKU is created equal. Some products fly off the shelves, while others just collect dust. A classic ABC analysis is the perfect tool for sorting your inventory by pick frequency or revenue contribution.
- 'A' Items: These are your superstars. They’re the top 20% of your SKUs that typically make up 80% of your total movement. These products demand the most accessible, prime real estate in your warehouse—no exceptions.
- 'B' Items: These are your middle-of-the-road products, the next 30% of SKUs that account for about 15% of movement. They’re important and should be placed in secondary, easy-to-reach locations.
- 'C' Items: This is the long tail—the remaining 50% of your products that only contribute to 5% of your movement. These can be stored in less accessible areas, maybe using high-density racking to maximize your space.
Getting this right is the absolute cornerstone of a smart warehouse layout and design. Forcing your pickers to walk to the back of the warehouse for an 'A' item is a rookie mistake that costs you time and money, hundreds of times a day.
Chart the Journey of an Order
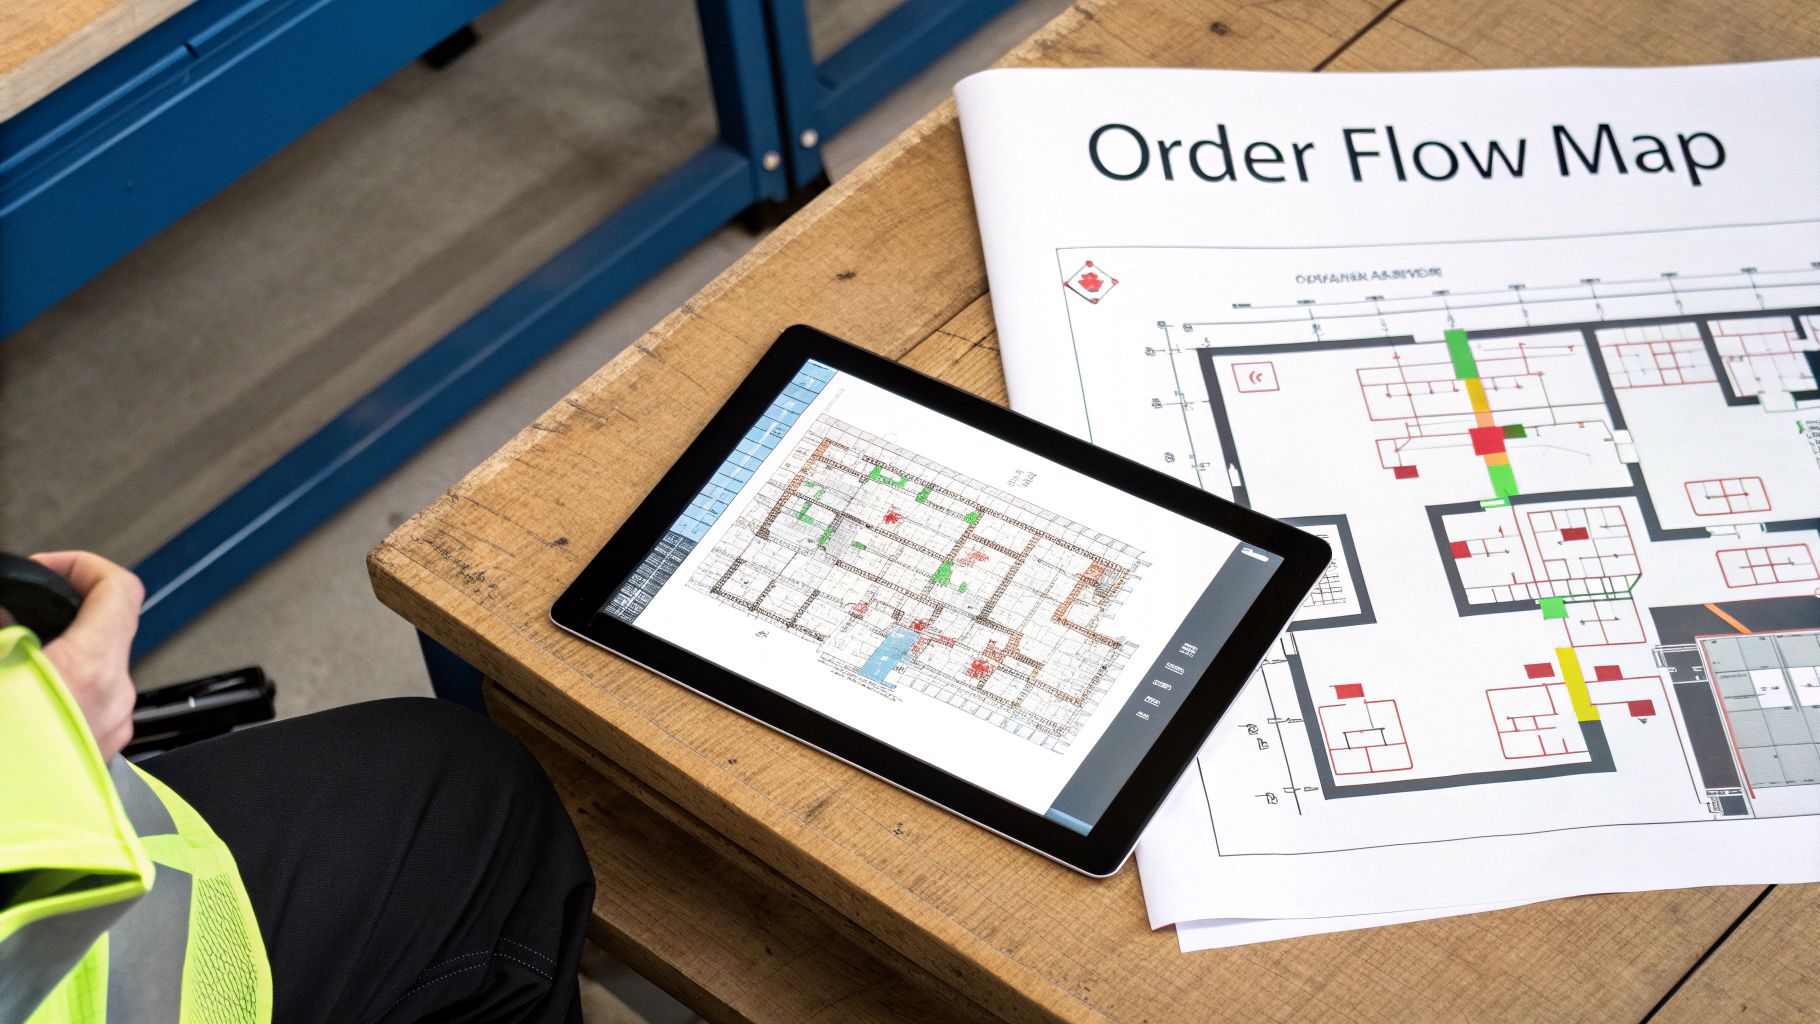
Once you know what moves, you need to map out how it moves. A process flow diagram is your best friend here. It helps you visualize the entire lifecycle of an order, from the moment a truck hits the receiving dock to the second a package is loaded for shipment.
Document every single touchpoint. Does a pallet get staged, then inspected, then broken down for putaway? Does a picked order need to stop at a kitting station before heading to packing? Be meticulous.
This simple mapping exercise will immediately shine a spotlight on hidden bottlenecks. You might discover your packing station is way too far from your high-velocity pick zones, or that inbound and outbound forklift traffic is constantly creating a traffic jam in the same aisle.
This visual map makes it painfully obvious where wasted steps are happening. And while you're optimizing the flow, make sure you're incorporating essential warehouse floor marking guidelines to create clear, safe, and efficient pathways for everyone.
Design Zones Based on Data, Not Guesswork
Before you start designing a warehouse layout, you need to gather the right data. This isn't about assumptions; it's about collecting hard numbers that reflect your true operational needs. The table below outlines the critical data points you should be collecting.
Key Data Points for Warehouse Workflow Analysis
With these numbers in hand, you can confidently move from guesswork to a data-driven design that will actually work for your operation. Now, you can make informed decisions about where to place critical zones.
This is about creating a lean, seamless workflow, not just finding a place to put things.
- Kitting and Sequencing: For any light-assembly work, your kitting zones have to be logically placed between component storage and the final packing areas. Putting them right next to the parts they use most often can slash material handling time.
- Value-Added Services (VAS): Where do you handle things like special labeling, bundling, or quality checks? These VAS zones need to sit along the natural path of product flow to stop any backtracking. A labeling station, for example, should be located just before the final packing area, not across the warehouse.
- Packing and Shipping: These areas have to be as close as possible to your 'A' items and your shipping docks. The goal is a short, direct path for your most frequent orders, cutting that "last 50 feet" of travel to an absolute minimum.
When you let data drive these decisions, you shift from a layout based on convenience to one built for pure performance. Every zone has a purpose, ensuring each step flows logically into the next.
Choosing the Right Storage and Racking Systems for Your Products
Your storage system is the skeleton of your warehouse. Picking the right one isn't about flipping through a catalog—it's about matching your physical infrastructure directly to your inventory's personality. A bad choice here means wasted space, sluggish picking, and a direct hit to your daily throughput.
This might feel like a modern problem, but organized storage has deep roots. The big shift started during the Industrial Revolution when mass production demanded specialized facilities. But it was the arrival of forklifts and pallet racks in the 20th century that truly transformed warehousing from simple storage into active inventory management. That was the foundation for the data-driven layouts we use today. You can get more insights on the history of warehouse design on sccgltd.com.
Matching Racking Types to Your Inventory Profile
Let’s be clear: there’s no one-size-fits-all racking solution. The right system is a direct reflection of your product mix, SKU velocity, and what you’re trying to achieve operationally.
Let’s break down the most common options and, more importantly, when to actually use them.
- Selective Pallet Racking: This is your workhorse. It’s the most versatile system out there because it gives you direct access to every single pallet. It’s perfect for operations with tons of different SKUs but not a huge number of pallets for each one. If your inventory is diverse and you need to grab any product at any time, start here.
- Double-Deep Racking: Think of this as a denser version of selective racking, with one row tucked behind another. It can boost your storage density by up to 40%, but you'll need a special deep-reach forklift to make it work. It's a great fit when you have multiple pallets of the same SKU and don't mind a Last-In, First-Out (LIFO) inventory flow.
- Drive-In/Drive-Thru Racking: This is your high-density champ, built for storing massive quantities of just a few SKUs. Forklifts literally drive into the racking structure to place or retrieve pallets. It’s a LIFO system that’s ideal for bulk goods or products with a long shelf life, like non-perishable foods.
The key feature of selective racking is its accessibility. For any operation juggling a wide variety of products that need to be picked individually, that access is non-negotiable.
Specialized Systems for High-Velocity Operations
For fast-paced e-commerce, 3PLs, or light-assembly operations, standard pallet racking often falls short. You need systems built for pure speed and density.
The goal isn't just to store products. It's to present them for picking in the most efficient way possible. Every second you shave off the pick path adds up to massive labor savings down the line.
Consider these more powerful alternatives:
- Pallet Flow Racking: This is a First-In, First-Out (FIFO) system. You load pallets on one side, and they glide down inclined rollers to the other side for picking. It’s a game-changer for high-volume, perishable goods or any date-sensitive inventory, since it automates stock rotation.
- Carton Flow Racking: This works just like pallet flow but is designed for individual boxes or totes. It's a staple in any high-volume, piece-picking environment. Fast-movers are loaded from the back and slide forward to the pick face, which drastically cuts down on how far your pickers have to walk.
- Pick Modules: These are multi-level beasts that combine different storage systems—like pallet racking, carton flow, and shelving—all into one dense footprint. They are the ultimate setup for fulfillment centers with high SKU counts and high order volumes, letting pickers move through dense zones with minimal travel.
Designing Hybrid Systems and Maximizing Vertical Space
The most effective warehouse layouts almost never use just one type of storage. The real magic happens when you build a hybrid system that’s perfectly tuned to your inventory.
For example, you could use selective racking for your bulkier 'B' and 'C' items, carton flow for your fastest-moving 'A' items, and a secure Vertical Lift Module (VLM) for small, high-value parts. This approach makes sure every square foot is working as hard as it can for the specific products it holds.
And don't forget to look up. When you're trying to squeeze more out of your existing footprint, commercial mezzanine floors can be a brilliant way to multiply your usable space. These platforms can literally double your floor space, giving you new areas for storage, light assembly, or even offices, all without the massive cost of expanding the building. It’s how you build a smarter, more cost-effective storage solution from the ground up.
Weaving Technology and Automation into Your Layout
In a modern warehouse, technology isn’t an add-on. It’s the central nervous system. A smart warehouse layout and design doesn’t just make room for tech—it’s built around it, anticipating the needs of your systems so your physical space accelerates your operations instead of slowing them down.
It's about creating a facility that's automation-ready from day one.
This all starts with your Warehouse Management System (WMS), the digital backbone of your entire operation. I've seen too many companies invest a fortune in a powerful WMS only to trip over simple physical hurdles that a little forethought could have avoided.
Laying the Groundwork for Digital Operations
Before you even think about running a single cable, map out how your team will interact with the system on the floor.
Your layout needs rock-solid, facility-wide Wi-Fi. This is non-negotiable. Meticulously test for dead zones, because a dropped connection in a back corner can bring picking or putaway to a dead stop, killing your productivity metrics.
Where you place fixed workstations and device charging stations also matters immensely. Don’t hide them in a back office. They need to be at logical transition points, like near staging areas or at the ends of high-traffic pick aisles. This way, they support the workflow instead of pulling people out of it. You can explore more about how a well-integrated system pays off by reading about warehouse management system benefits.
A layout that ignores the needs of its core technology is fundamentally flawed. You're creating friction at every turn, forcing your team to work around the building's limitations instead of being empowered by its design.
Designing for Automation—Today and Tomorrow
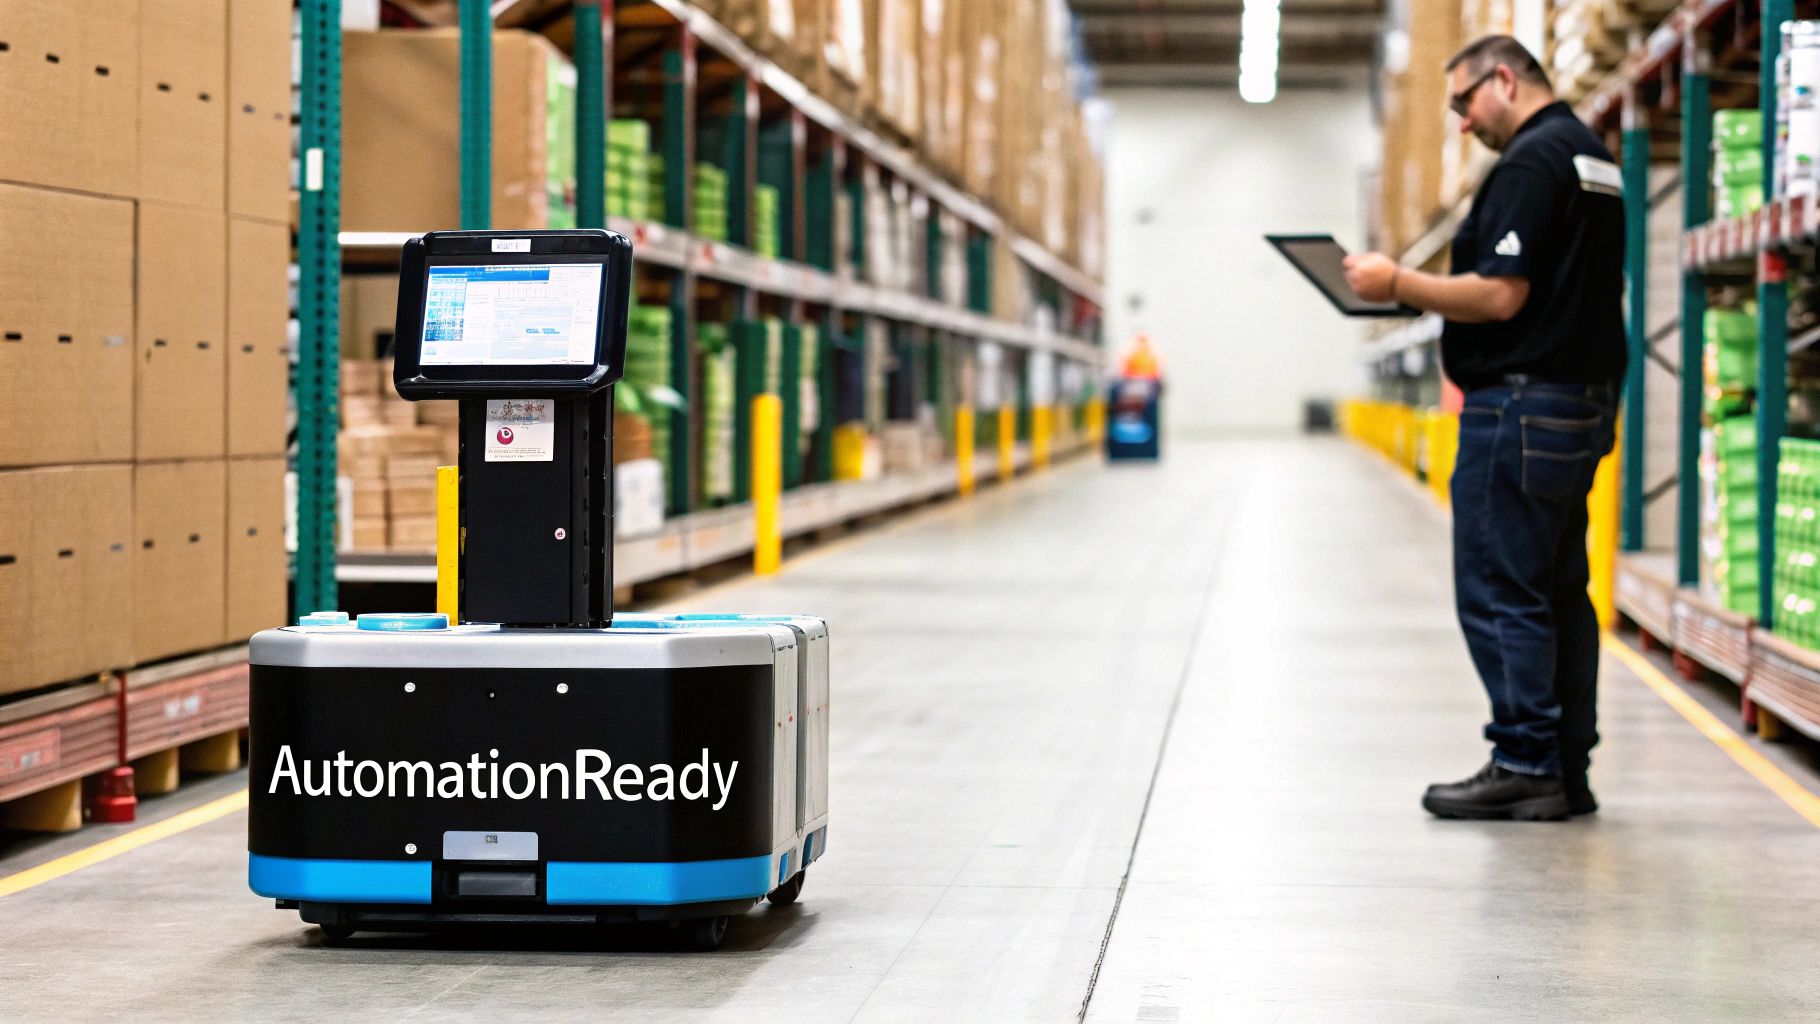
True integration goes way beyond software. With automation becoming more accessible, your physical layout has to be ready to accommodate it without a massive, costly overhaul. The real strategic advantage comes from planning for robotics from the get-go.
Thinking about bringing in Autonomous Mobile Robots (AMRs) down the line? If so, your layout needs to account for a few critical factors:
- Aisle Width: Standard forklift aisles might not cut it. You need enough space for robots and people to work alongside each other safely.
- Floor Quality: AMRs depend on smooth, level floors for precise navigation. Any cracks, significant bumps, or steep inclines can throw their systems off completely.
- Clear Pathways: The design must include designated, unobstructed travel lanes for robots, free from both permanent and temporary clutter.
- Charging Zones: Robots need a home base. Your layout has to include dedicated charging stations located out of the main flow of traffic but still easy for them to access.
Building a Flexible and Scalable Footprint
You might not be installing a full goods-to-person system tomorrow, but your layout should be flexible enough to handle it in the future. The key is to think in modular terms.
Design certain zones with wider-than-needed aisles. Leave some open, flexible floor space that could one day house a conveyor, an auto-bagger, or a robotic kitting cell. This "soft-zoning" approach gives you options without locking you into one specific technology.
The goal is to create a warehouse where technology can be phased in logically. Maybe you start with voice-directed picking, add AMRs for transport next year, and eventually install a small ASRS for your fastest-moving SKUs. A forward-thinking warehouse layout and design makes this evolution possible, ensuring your facility remains a competitive asset for years to come.
Designing Docks and Staging Areas for Flawless Flow
Think of your warehouse docks as the heart of your entire operation. They pump materials in and finished goods out. If they get clogged, the whole system grinds to a halt. A poorly designed dock and staging area is a surefire way to create bottlenecks, waste drivers' time, and invite chaos onto your floor.
Getting this piece of your warehouse layout and design right isn't just important—it's everything.
This isn’t just about having enough doors. It’s about building a fluid, predictable system where trucks can get in, get loaded or unloaded, and get out with zero friction.
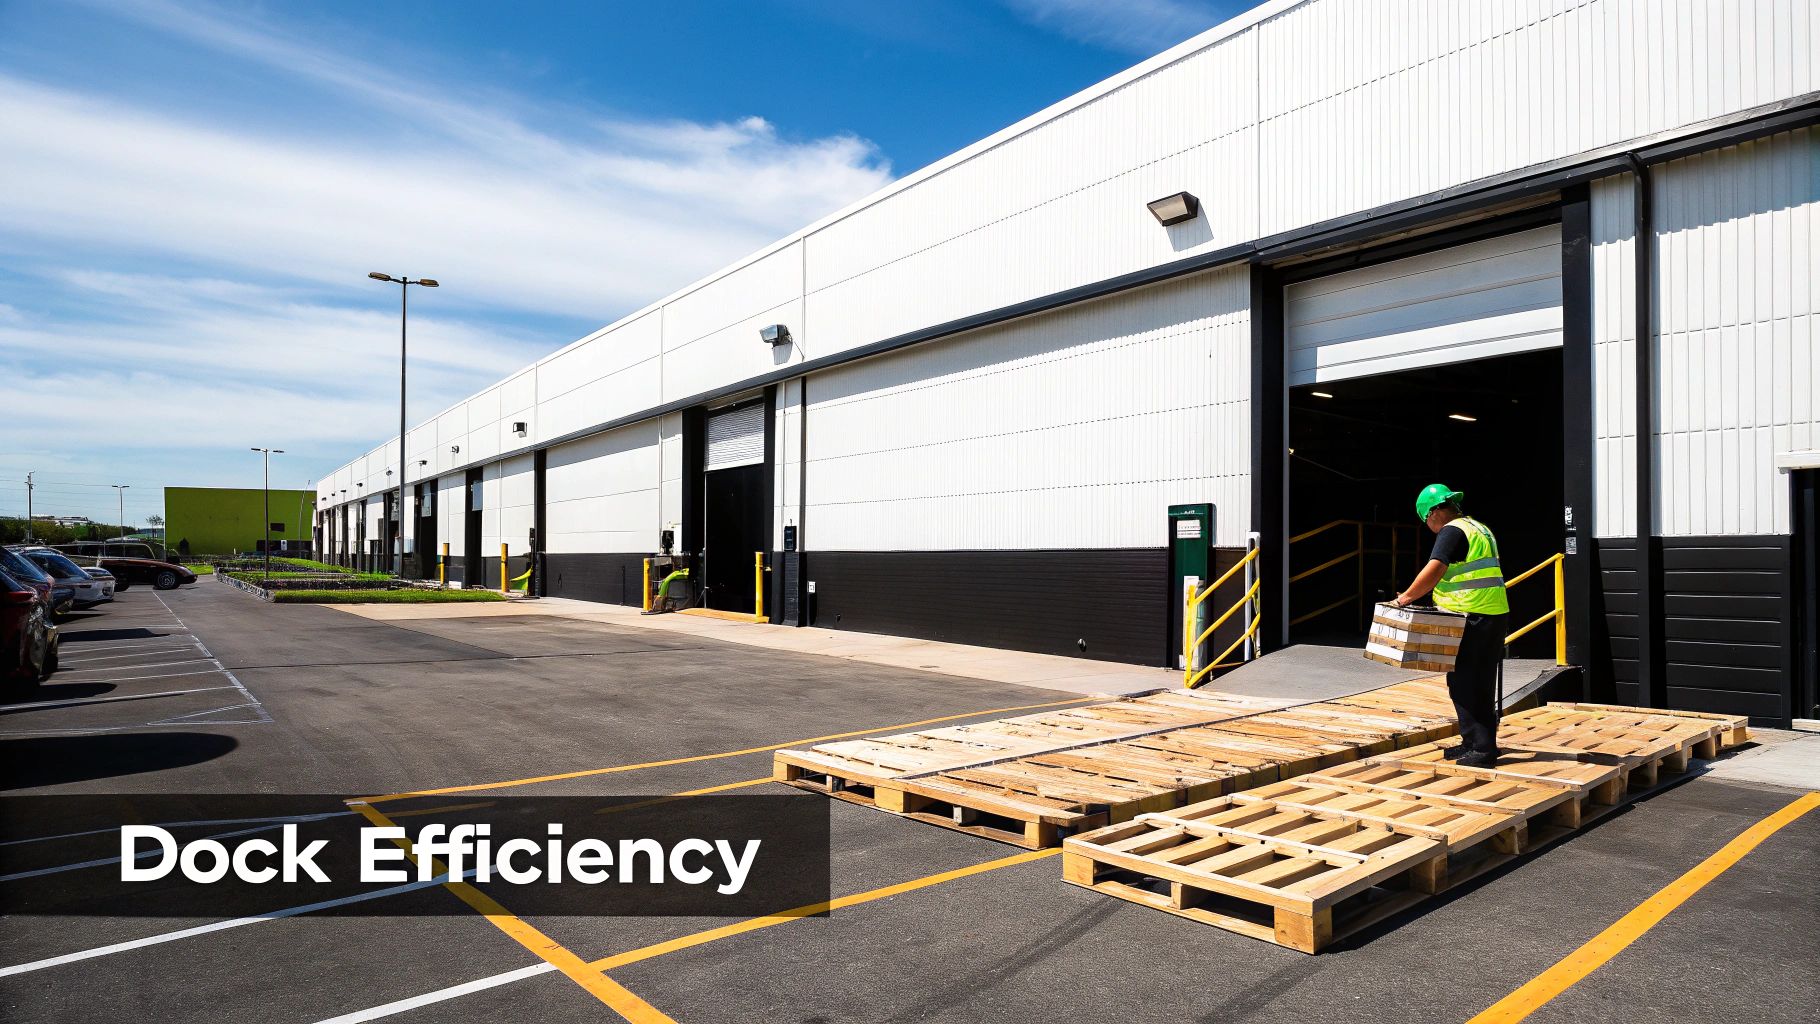
Calculating Your Dock Door and Apron Needs
The first question I always get is, "How many dock doors do we actually need?" The only right answer comes from your data. Don't guess. Pull your records for peak inbound and outbound volumes and see how many trucks you're handling during your busiest hours. I’ve seen countless operations hamstring themselves by underestimating this from day one.
Just as critical is the apron space—the concrete pad outside where trucks have to maneuver. A tight apron forces drivers into tricky, time-sucking reverse maneuvers, which skyrockets the risk of accidents and equipment damage.
- Rule of Thumb: A standard 53-foot trailer needs at least 110 feet of apron depth for a driver to back in safely. To make it fast and easy, you really want to aim for 130-150 feet.
A common mistake is sacrificing apron space to get a few more square feet inside the building. Trust me, the time you'll lose to drivers struggling to back in will cost you far more in detention fees and delays.
Architecting Staging Areas That Eliminate Congestion
The staging area is where the real magic—or misery—happens. It's the buffer zone for inbound goods before putaway and for outbound orders before they're loaded. If this space is too small, it will absolutely choke your entire workflow.
Think of it this way: your inbound staging area must be large enough to hold the entire contents of a full truckload without spilling into travel aisles. For outbound, it needs to comfortably fit several completed orders, especially when you’re pushing to get shipments out the door.
Outbound Staging Strategies
This is where a little discipline goes a long way. Don't just designate a big open area for "outbound." Create clearly defined lanes.
- Carrier-Specific Lanes: Set up dedicated lanes for your big carriers like FedEx, UPS Freight, or key LTL providers. This simple step makes loading so much faster and virtually eliminates the risk of a pallet ending up on the wrong truck.
- Route-Based Lanes: If you run your own fleet or have dedicated carriers, organize staging lanes by delivery route. This helps drivers load their trucks in the correct last-in, first-out sequence, which is a huge deal for them on the road.
- Proximity is Key: Always locate your staging lanes directly in front of their assigned dock doors. Making a forklift operator drive across the warehouse from the staging lane to the truck is a massive waste of time and fuel.
This organized approach turns a potentially chaotic floor into a smooth, efficient dispatch center. The goal is to make that final loading step as simple and mistake-proof as you possibly can.
Deciding how to lay out your docks and staging involves balancing speed, safety, and how you use your space. Each choice has a direct impact on your daily operations.
Dock and Staging Area Design Considerations
Ultimately, the right design depends entirely on your specific volume and workflow. A high-turnaround 3PL will have very different needs than a light-assembly operation focused on meticulous order fulfillment.
Separating Inbound and Outbound Flows
Whenever the building allows for it, dedicate separate doors and staging areas for receiving and shipping. While smaller facilities often use a U-shaped layout where docks handle both, a straight-through design is the gold standard for high-volume operations. Receiving happens on one side of the building, and shipping happens on the other.
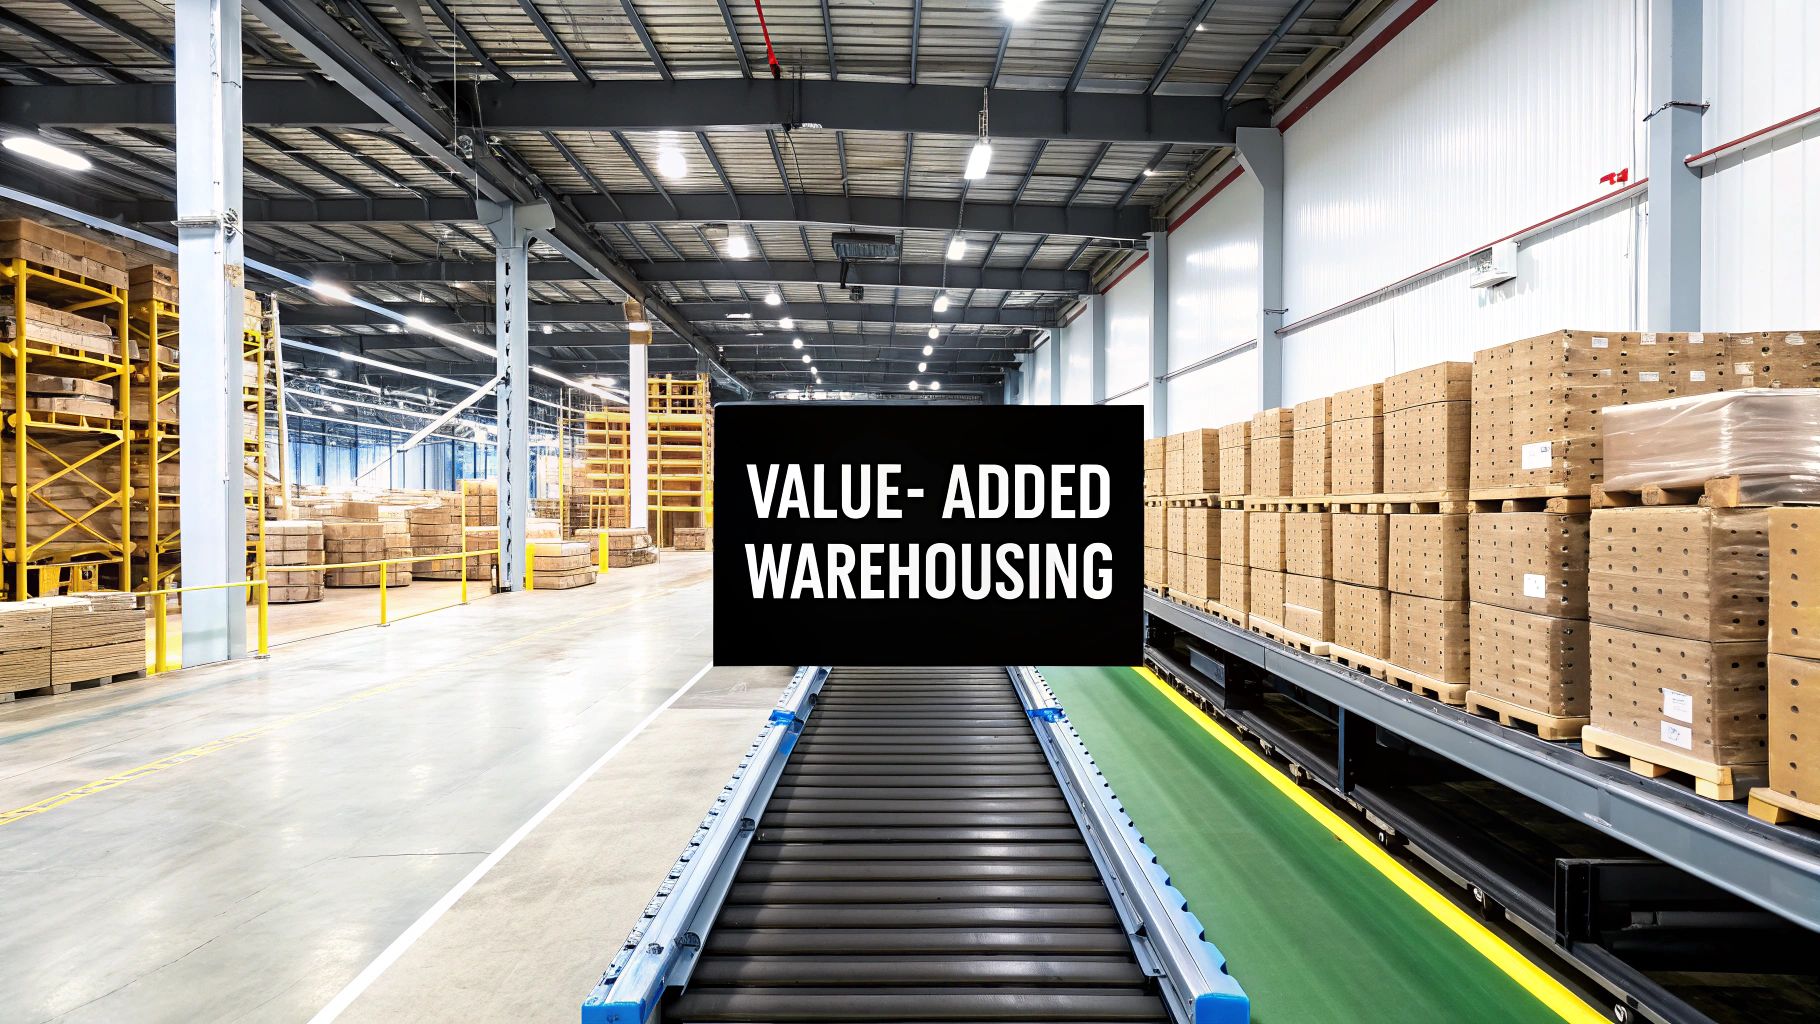
This separation is huge. It stops inbound and outbound forklift traffic from crossing paths and creating confusion. Your receiving team isn't trying to break down pallets while tripping over staged orders waiting for a truck. This becomes absolutely critical for anyone doing kitting or assembly, where keeping inbound components separate from finished goods is non-negotiable for inventory and quality control. This discipline is a core part of higher-level services, as you can see when exploring value-added warehousing services.
By treating your docks and staging areas with the same careful planning as your racking and pick zones, you lay the foundation for a supply chain hub that is smooth, predictable, and incredibly efficient.
Bringing Your New Warehouse Design to Life
A brilliant warehouse layout on paper is just a starting point. The real test is turning that blueprint into a high-functioning reality on the floor. This is where your strategic vision meets the day-to-day grind.
But here’s the thing: a successful launch isn't just about moving racks. It requires a disciplined approach to prove your new design is actually working. Without hard data, you're just guessing whether your investment is paying off.
Measuring the Impact with the Right KPIs
To prove the ROI of your new layout, you have to track the right key performance indicators (KPIs). These numbers give you an objective look at whether the new flow is delivering the efficiencies you planned for.
Focus on a handful of high-impact metrics:
- Order Picking Accuracy: This directly shows how the new layout helps slash errors. A well-organized space with clear slotting should push this number toward 99.9%.
- Average Travel Time Per Pick: This is the ultimate test of your workflow. Shorter travel times mean your ABC analysis and zoning strategy are working as intended.
- Cube Utilization: This metric reveals how well you’re using every inch of your vertical and horizontal space—a key indicator of capital efficiency.
- Dock-to-Stock Time: How fast can you get inbound product received, checked, and put away? A clean receiving and putaway process will cut this time dramatically.
A common mistake is waiting to track KPIs until weeks after launch. You need to start benchmarking these numbers before you change a single thing. That baseline data is the only way to definitively prove the value of your new design.
Your Phased Implementation Checklist
A successful rollout is almost never a "flip the switch" event. A phased approach is always smarter because it minimizes disruption to your live operations. Trying to change everything at once is a recipe for chaos, lost orders, and a frustrated team. While the specifics of how to build a warehouse from scratch differ from a redesign, the principle of careful planning is exactly the same.
Your implementation plan should be a detailed checklist covering these key moves:
- Finalize Vendor Coordination: Nail down the installation timelines for racking, technology, and any MHE. Make sure all contractors are aligned on the schedule to prevent costly delays.
- Plan the Phased Rollout: Break the project into manageable chunks. Maybe you start with the receiving area, then tackle one racking zone at a time, and finish with the packing and shipping docks.
- Conduct Comprehensive Team Training: Your team needs to understand the why behind the new layout, not just the what. Train them on new workflows, technology, and safety protocols well before you go live.
- Execute the Physical Move: This is where the rubber meets the road. Plan the inventory relocation meticulously—often during off-hours or weekends—to minimize the hit to order fulfillment.
- Monitor and Adjust Continuously: A warehouse layout is never truly "finished." It's a living system. Use your KPIs to monitor performance, get feedback from your team on the floor, and make continuous tweaks to optimize the flow. This ongoing improvement is what keeps your operation competitive.
Got Questions About Your Warehouse Layout? We've Got Answers.
Even the best-laid plans run into real-world questions. When you're in the middle of a complex warehouse design project, practical challenges always pop up. Here are some straightforward answers to the questions we hear most often.
What’s the “Best” Layout for Warehouse Efficiency?
There’s no magic bullet here—the best layout is the one that fits your operation like a glove.
For high-volume distribution centers, a straight-through (I-shaped) layout is often the top choice. Receiving docks are at one end, shipping is at the other, creating a clean, linear path for goods to travel. It's simple and incredibly effective for fast-moving inventory.
That said, many facilities get incredible results with a U-shaped layout. This design puts receiving and shipping docks on the same side of the building. Why? It gives you fantastic oversight of all dock activity and seriously cuts down on travel time for forklifts that are handling both inbound and outbound goods.
How Much Aisle Width Do I Really Need?
This is the classic trade-off between storage density and operational speed. Getting it right is crucial.
Standard forklift aisles usually need between 10 to 12 feet of space. But if you’re trying to maximize every square foot, a very narrow aisle (VNA) setup can shrink that down to just 5 to 7 feet. This dramatically increases your storage capacity but means investing in specialized lift trucks.
Your material handling equipment and pick velocity should drive this decision. Wider aisles are forgiving, allow for two-way traffic, and keep things moving fast. VNA layouts are perfect for squeezing the most out of your reserve storage areas where speed isn't the top priority.
How Does an ABC Analysis Actually Improve a Layout?
An ABC analysis isn't just theory; it's one of the most practical tools for designing a smart layout. It works by sorting your inventory based on how often it moves:
- A-items are your rockstars—the high-velocity products. You want these in the most accessible spots, right near your packing and shipping zones.
- B-items are your steady movers. Place them in secondary locations that are still easy to get to.
- C-items are the slow-movers. These can be stored in less accessible areas, often using higher-density racking to save prime real estate.
This simple, data-driven approach is a game-changer. It directly attacks picker travel time, which is almost always one of the biggest labor costs you have.
At Wolverine Assemblies, LLC, we don’t just fill a warehouse; we build lean, efficient workflows into every square foot. If you need a partner who gets how a strategic layout drives performance in complex assembly and 3PL operations, see what we can do for you at https://www.wolverine-llc.com.
Subscribe to our weekly newsletter